Showing posts with label Organization. Show all posts

Tuesday, July 7, 2015

Beauty rehab


We all get lazy and put off cleaning our makeup brushes for weeks, maybe even months. Eventually we do clean them since we know they house bacteria but do we ever think of cleaning the rest of our makeup and beauty products? You definitely don't need to clean all of your beauty collection as often as your brushes, but it is something you shouldn't forget to do!. This post is all on how to deep clean your makeup station to freshen and tidy everything up. 
I know I can admit that I tend to hold onto makeup I absolutely never use! I've always been kind proud of my large (to me) collection and I don't really want to let anything go. Once in a while, I force myself to get rid of things I never find myself using. However, you don't just have to throw things sway, there are other ways to use your old makeup!


Here is my makeup desk. It's where I get ready every morning, get un ready every night, and basically where I really do any beauty regimen. It gets pretty cluttered and messy. Papers pile up, makeup is left out, products get cluttered. Every once in a while, I'd say every 2 weeks to a month, I like to clean it all up a bit. Usually all I do is wipe down the desktop and tidy it up a bit. However, here's what I do when I go the whole 9 yards. 


 My drawers were cluttered and a bit over-full.


 My brushes were oh-so-dirty!


 My daily products cluttered as usual.


 My brushes have seen better days.


And my organizers were looking a little cloudy, not it a good way!


I came prepared with my three besties when it comes to my "beauty rehab". Surface wipes, baby shampoo (you'll see why), and a couple of cloths!


I like to start by clearing the area, one side at a time, and wiping the tabletop down with a wipe. A lot of dust tends to build up and no one wants that!


 Start one section at a time and clean as you go. First go through to see what you want to keep or toss. Don't throw anything out yet, you may be able to re purpose it in the end!


I tidied up my "product back up bin" and got rid of a few things that didn't belong.
Then I cleaned out my three drawer organizer. I wiped down all of my products, all of the drawers, and I sorted through to see if there was anything I didn't need in there. 


 Don't pass by cleaning the inside of your makeup too!


 As well as the mirrors of your compacts!


 I tackled my products bin, moved out the things I don't use daily and wiped down all of the products.


 I also cleaned my hairbrushes which is so easy and worth it! 
First I picked out all of the hair, the end of a comb works really well! To clean them all I did was fill the sink with a small amount of regular shampoo and warm water and soaked them for around 30 minutes. Then leave them to dry bristle side down. This gets rid of an oils and such.


I also cleaned my makeup brushes with baby shampoo.


 I sorted through my drawers, got rid of products I don't use and wiped everything down too!


Don't just throw everything away! You can re purpose a lot of your stuff!
Wash your favorite mascara wands with some water and a bit of soap and you now have your own brow spooleys or clean mascara wands.
Check to see if the brand has a recycling program like back to MAC.
Clean out your old lipsticks and make a DIY lisptick!

Also make sure to replace things like face sponges, loofahs and even your hairbrushes once in a while!

I hope this was helpful, good luck with your beauty rehab!

Monday, April 20, 2015

Surviving Spring Cleaning


Spring Cleaning season is upon us and it can be super difficult to get motivated. I thought I'd share some tips on how make it a little more survivable. These definitely help me since I don't even really mind cleaning my room anymore. Hope it helps! :)


Throw away 1 thing a day
Start off small by only throwing out 1 thing per day. Choose an area of your room and pick something to get rid of (or donate of course!).

Devote 1 day to cleaning
I like to do this once in a while, usually on Sundays. I like to dedicate 1 whole day to cleaning. it makes me feel super productive. 

Play some music
I'm sure you all know this, but playing your favorite music helps the cleaning process a ton!

Fuel up
Make some fun snacks and don't forget to eat throughout the day! Sometimes when I clean for long periods of time, I kind of forget to eat which can really make you less energized.

Treat yourself
After you're done (or during) cleaning, have a treat or pamper yourself a bit. Do whatever makes you feel good!

Take breaks
This is majorly important! You need to take breaks, they are the perfect opportunity to treat yourself!

Make it fun
 If you love organizing, organize all of your stuff. Coordinate cleaning with something you enjoy.

Find a friend
 Ask a friend to hangout with you while you clean, it will make it a lot more fun and time won't pass as slowly.

Don't get distracted
 I often get distracted by little memories and what not. Try to put them aside to look at another time so that you don't end up getting distracted from cleaning.

Get comfy
Put your hair up and throw on some super comfy clothes to make it a little more enjoyable.

Make it therapeutic
It can be really therapeutic for me to take time to myself and clean. Taking time to yourself in general is quite therapeutic.

Keep your stuff close and your garbage closer
Okay, well that was cheesy... Anyways, keep a garbage can super close so you don't have to keep getting up and going to the trash. 

I hope this helps your spring cleaning go a little smoother!


Saturday, March 28, 2015

Weekend Project #5 DIY Jewelry dish


I have had so much fun with my Weekend Projects in the past, I just had to do another one! This week's project is a DIY Jewelry Dish.It's really chic and customizable to match any bedroom. It's super simple to make so I would definitely recommend trying it out! It's not just for jewelry, you could store anything you'd like in it!
Enjoy :)


 Some supplies you will need are:

-A bowl or dish (I found mine at the grocery store)
-Rubbing alcohol (for best paint adhering) 
-Paint of your chosen colors
-Paint brushes
-Varnish (optional)
-Washi tape &/or anything else to decorate (optional)
 
 
 I had this bowl lying around for quite a while and it seemed so boring. I decided to jazz it up a bit with some paint! You can really use any dish you'd like. 
First, I quickly wiped down the bowl with rubbing alcohol, to make sure the paint would stick.
 
 
I then went in with a gold acrylic paint. Don't worry if it looks awful on the first coat. I think mine took about 4 or 5 coats to get to my desired opacity.


Once the outside had dried, I moved onto the inside. For the inner portion of the bowl, I chose a pale pink acrylic paint.  This one took about 2 to 3 coats.
Since this paint has a matte finish, I went over it with a varnish to give a glossy shine. This step is optional, but I think it really pulls the whole thing together.


And that's it! If you'd like, you can decorate it with anything else but I decided to keep it plain. This is a great organizing piece for any room.

That's all for this DIY, have an amazing weekend!

Monday, March 23, 2015

Planner Decorating


After seeing planner decorating gradually becoming more and more popular, I thought I'd finally hop on the trend! I'd always tried using planners but they never really lasted more than a few weeks, maybe a month if I was lucky. I figured decorating my planner would make it more appealing and it definitely did. I now find myself checking my planner several times a day and it has really kept me on track. When I search up "planner decorating" on Pinterest, I'm overwhelmed with inspiration and I love it, so I thought I too would share how I decorate my planner.


I received this planner for Christmas and I've gotten lots of use out of it. It's super cute and compact. The only downside is the size of the days, but it's worth it to have a page of notes on the right.


 To start, I separate each day with washi tape. I've recently become obsessed with washi tape. You can find it places like Target, Walmart and Michael's. I try to switch up the colors each week. As you can tell, I took these photos a couple of weeks ago.


 Next, I go in with this paper tape from Kid Made Modern that I found at Target. It works perfectly for planning my blog posts.


I sometimes have to switch up my blog post schedule which is why I haven't posted a "stay positive" post yet.


On the right side of my planner, I like to start a to-do list for the week. This is what keeps me most organized and on top of everything. Every time I think of something, I add it to the list, and by the weekend I have all of my tasks on one list.


 I also like to use these little page tabs for any other important events or anything.


 I'll also add things I need to remember to get done sooner on these tabs.


That's basically it! After my planner is all decked out, I'll go in and write in any other important dates or ideas throughout the week. This has rally helped to keep me completely organized and I'd definitely recommend it. It's also really therapeutic to take some time to myself to plan the upcoming week.

Friday, December 5, 2014

Blogmas 2014: Day 5 ~ My Vanity Set Up & Makeup Organization!


I have never shown my makeup setup on my blog since I've been looking for the right time, and I wanted my vanity to be perfect. I realized my vanity would never be perfect and there was no better time to show it than the present! My setup isn't anything special yet I'm very pleased with it. I tried to de-clutter it as much as possible however with my small room, there's not many places I can put things. I do have quite a bit of makeup, but still not as much as some. I really love makeup and it's my favorite thing to do in the morning. I also really enjoy organizing so I change it up a bit every so often. I feel I must say, I'm not trying to brag at all, just thought I'd share my setup! I hope you enjoy and can gain some inspiration from this!


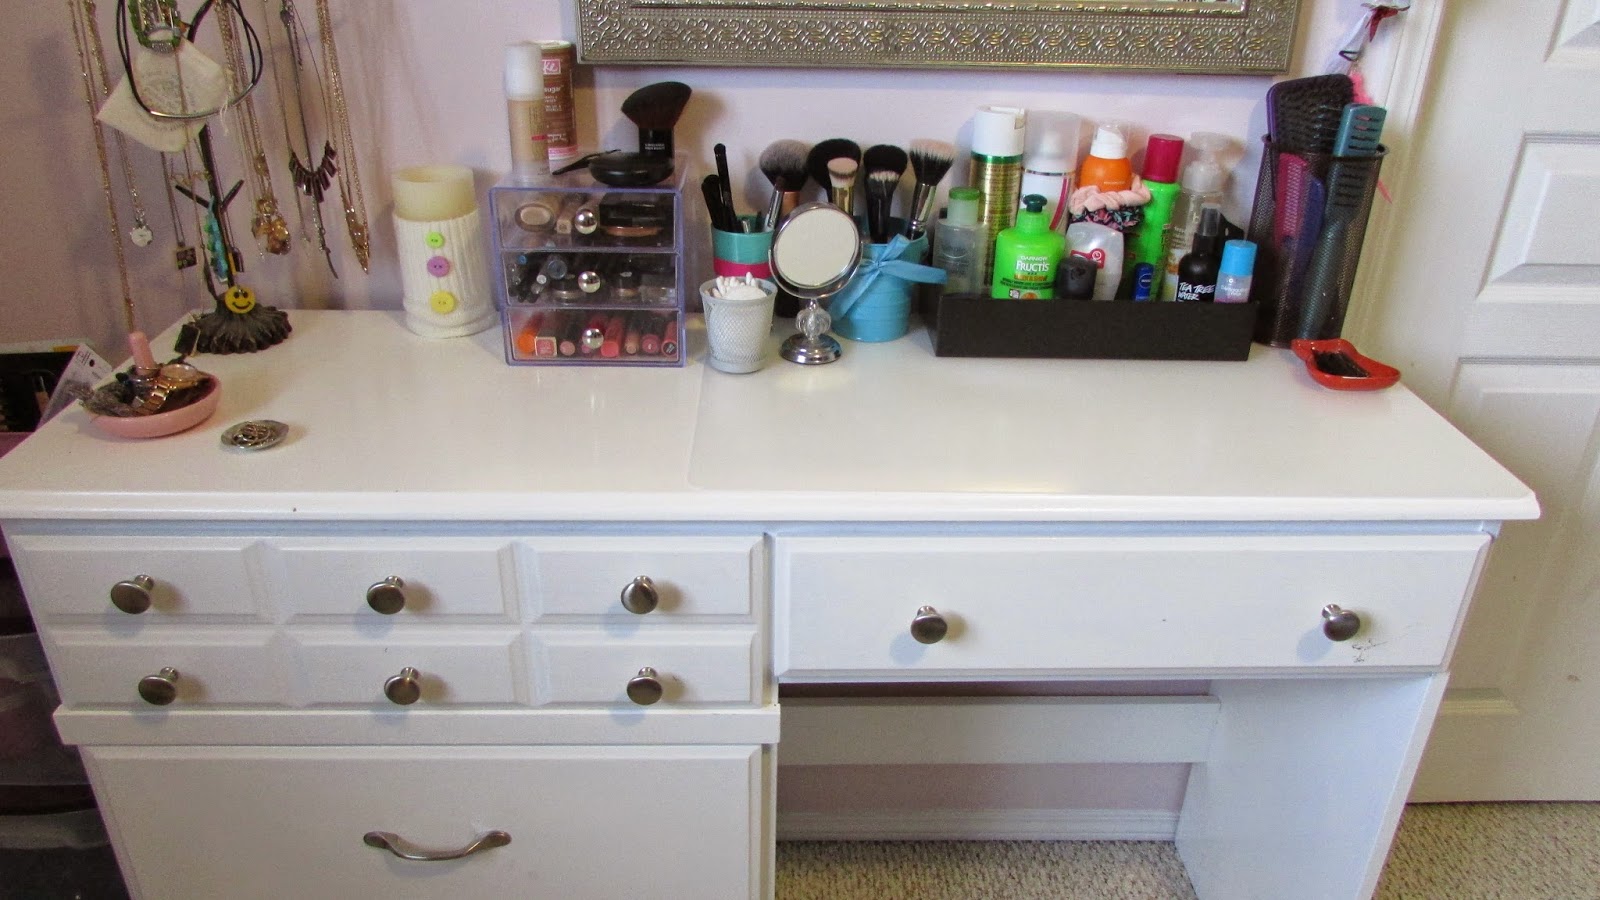
I don't use an actual "vanity", I've just transformed this plain desk into my very own makeup station. I don't remember where I got this desk, I believe it was a hand-me-down. However I do remember that it used to be grey with black handles. I repainted it white and added some silver knobs and it began to look a little more girly & classic! It's really old, and starting to fall apart so I've been looking for a new one!


I try to keep the top clear, but of course that's impossible for me! I always end up piling on little notes, and things like that.


On the left, I keep my necklace tree with all of my necklaces hanging on it. I think I purchased this from Homesense a few years ago. I've accompanied the jewelry tree with a flame-less candle equipped with a little cover I made from an old sweater!


In front of that, I keep more of my jewelry (rings mostly & my watch). The pink ring holder is from the dollar section at Target and the tiny, silver bowl/tray was a gift.


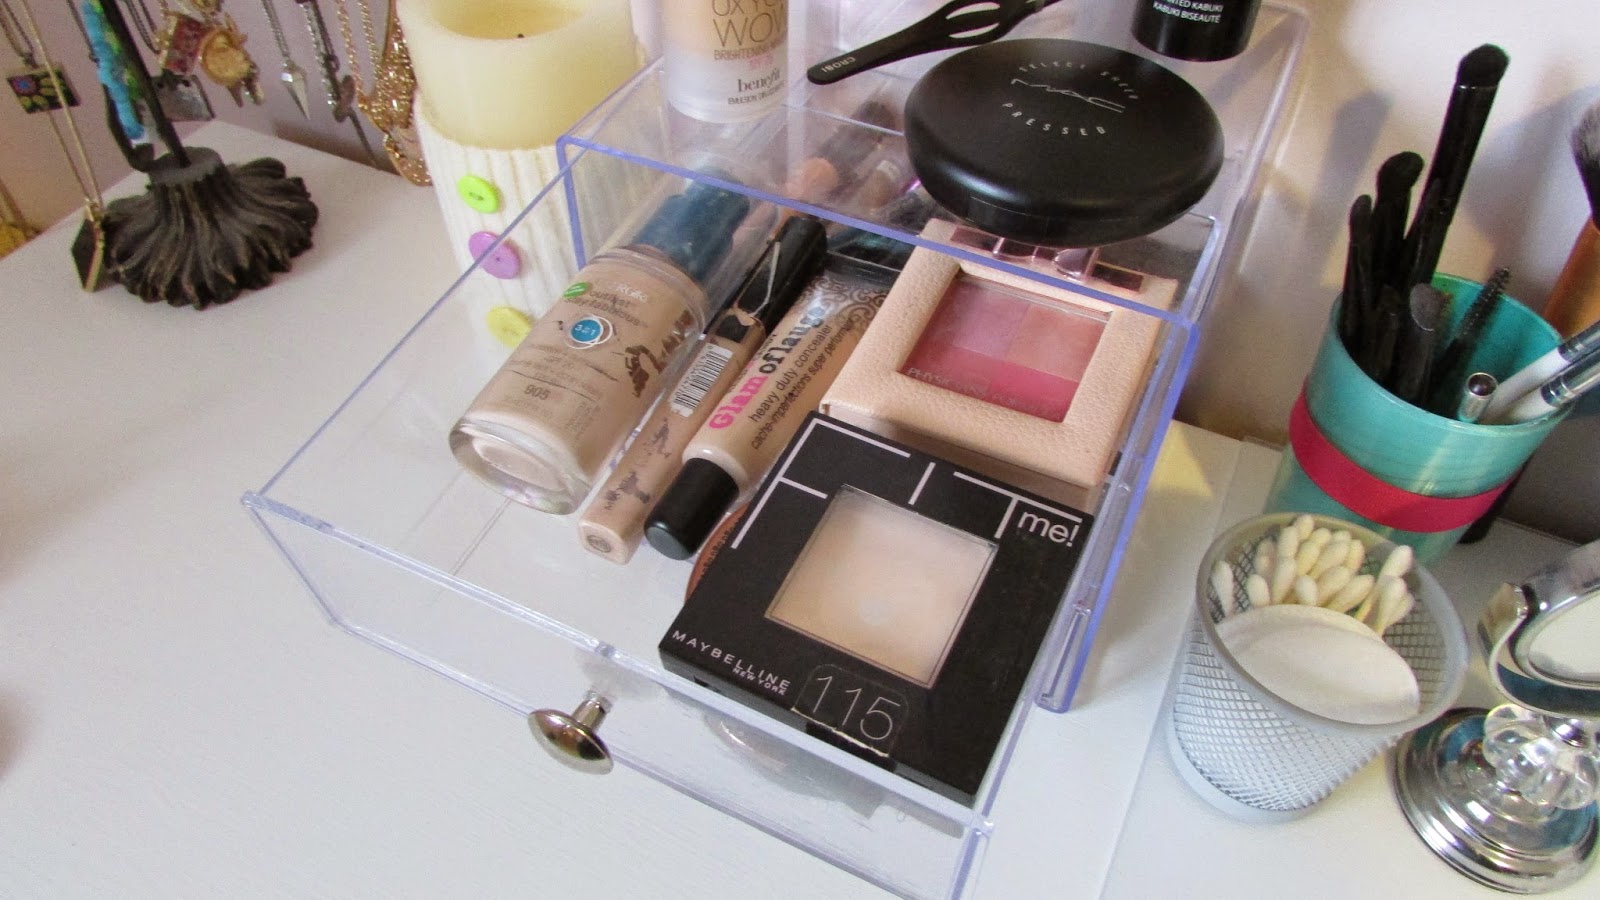
Beside all of that, I have my 3 drawer acrylic container from The Container Store. I must say, I am very glad that I purchased this. It goes with the whole theme, and gives me a lot of extra space. I store all of the products I use most often in here.


 The first drawer holds my everyday face products: Foundation, concealer, powder, blush & bronzer


 The second contains most of my eye products: Mascara, eyeliner, brow products, primers etc...


The third drawer is for my favorite lip products: Glosses, stains, lipsticks etc...


 To the right of that, I have a few cups holding my makeup brushes, as well as a smaller cup holding cotton pads & swabs. I also have a small mirror with a regular and magnified side. I use the magnified side to apply mascara. I DIYed the pink and blue cup using a dollar store glass, and the blue pail is from the dollar store as well, filled with filler beads. The mesh cup is from Ikea and the mirror was a gift however I've seen them at Winners.


I keep miscellaneous products in a black box that my hair straightener came in. In here I have hair products, skin care, deodorant, hair ties, hand sanitizer & more. 


 I got this little candy dish from the Target dollar section and I keep my bobby pins in it.


I keep my hair brushes and combs in this large cup from a set of drawer dividers from Homesense. 


Above my desk is a large mirror, also from Homesense, and above that are a couple of paintings that I painted.


In the drawer on the right of my desk, I keep more of my makeup in these dividers also from Homesense. In here I have other face products I don't reach for, Baby Lips and other lips products, eyeliners, pigments and few other odd and ends.


In the very top drawer on the left side of the desk, I store all the rest of my makeup. In here I mostly eyeshadows (singles & palettes) as well as a few blushes and what not. I also keep my makeup wipes and a couple of Walmart cloths in there.


That's about it! I didn't show the actual mirror since the rest of my room is a bit messy, however you kind slightly see the edge of it right about the desk.  

Maybe sometime in the future I'll do a makeup collection, who knows! That would definitely be a very long blog post. I hope you enjoyed this and I hope your day is great!