Showing posts with label DIY. Show all posts

Wednesday, July 15, 2015

DIY Summer room decor! (part 2)


Here is my DIY Summer room decor part 2! I have 4 more fun and easy room decor ideas for the Summer. I found a lot of inspo from Pinterest and I would totally recommend browsing for even more DIYs! I hope you try these out!

DIY POPSICLE GARLAND 


 Supplies:
Colored craft paper
Washi tape
Double sided tape
Popsicle sticks
Hot glue
String/yarn/ribbon
Any other decorating supplies


1. Draw a popsicle shape freehand or print out a stencil. I went freehand.
2. Cut out your shape and use it as a stencil for the rest of your popsicles. I made 5.
3. Cut out your shapes.
4. Decorate your popsicles as desired. I used craft tape, colored paper and a sharpie.
5. Glue the stick on the back of the "popsicles" then glue the popsicles 2-3 inches apart on a long piece of string.

This is a super cute DIY. You can see the garland better in the very first photo.
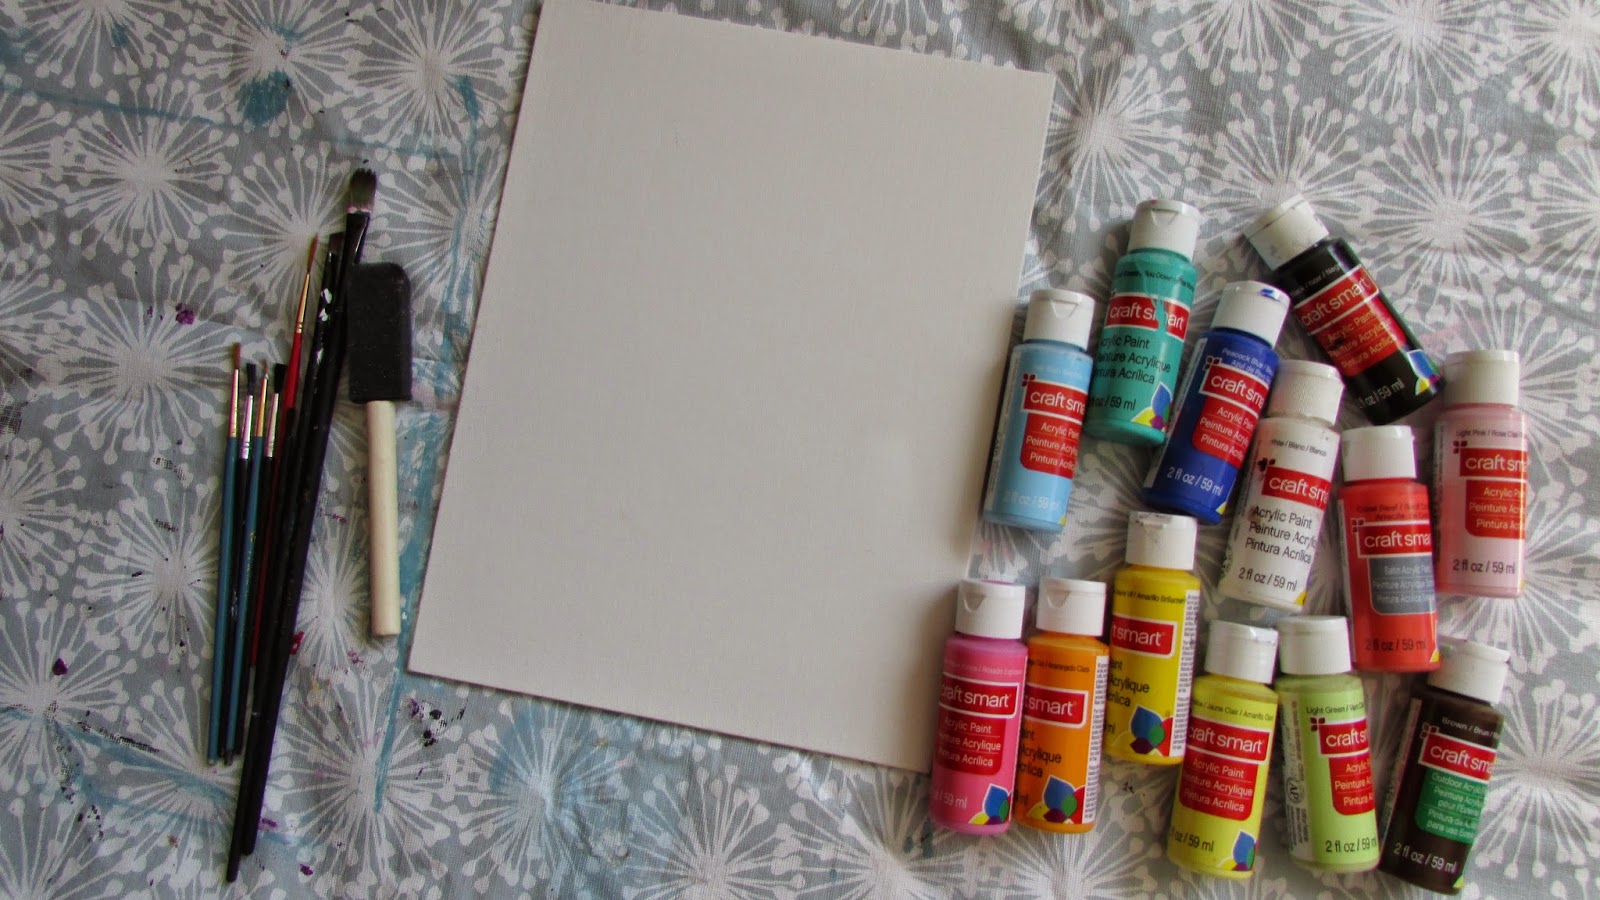
WATERCOLOR CANVAS


Supplies:
Blank canvas
Water
Paint brushes
Watercolor paints
Paper towel & surface to mix paints on
Sharpie (optional)


1. Pour out some of your favorite paint colors onto a dish. I used a plastic lid.
2. Dip your paintbrush in a cup of water.
3. Pick up a small amount of the watercolor paint.
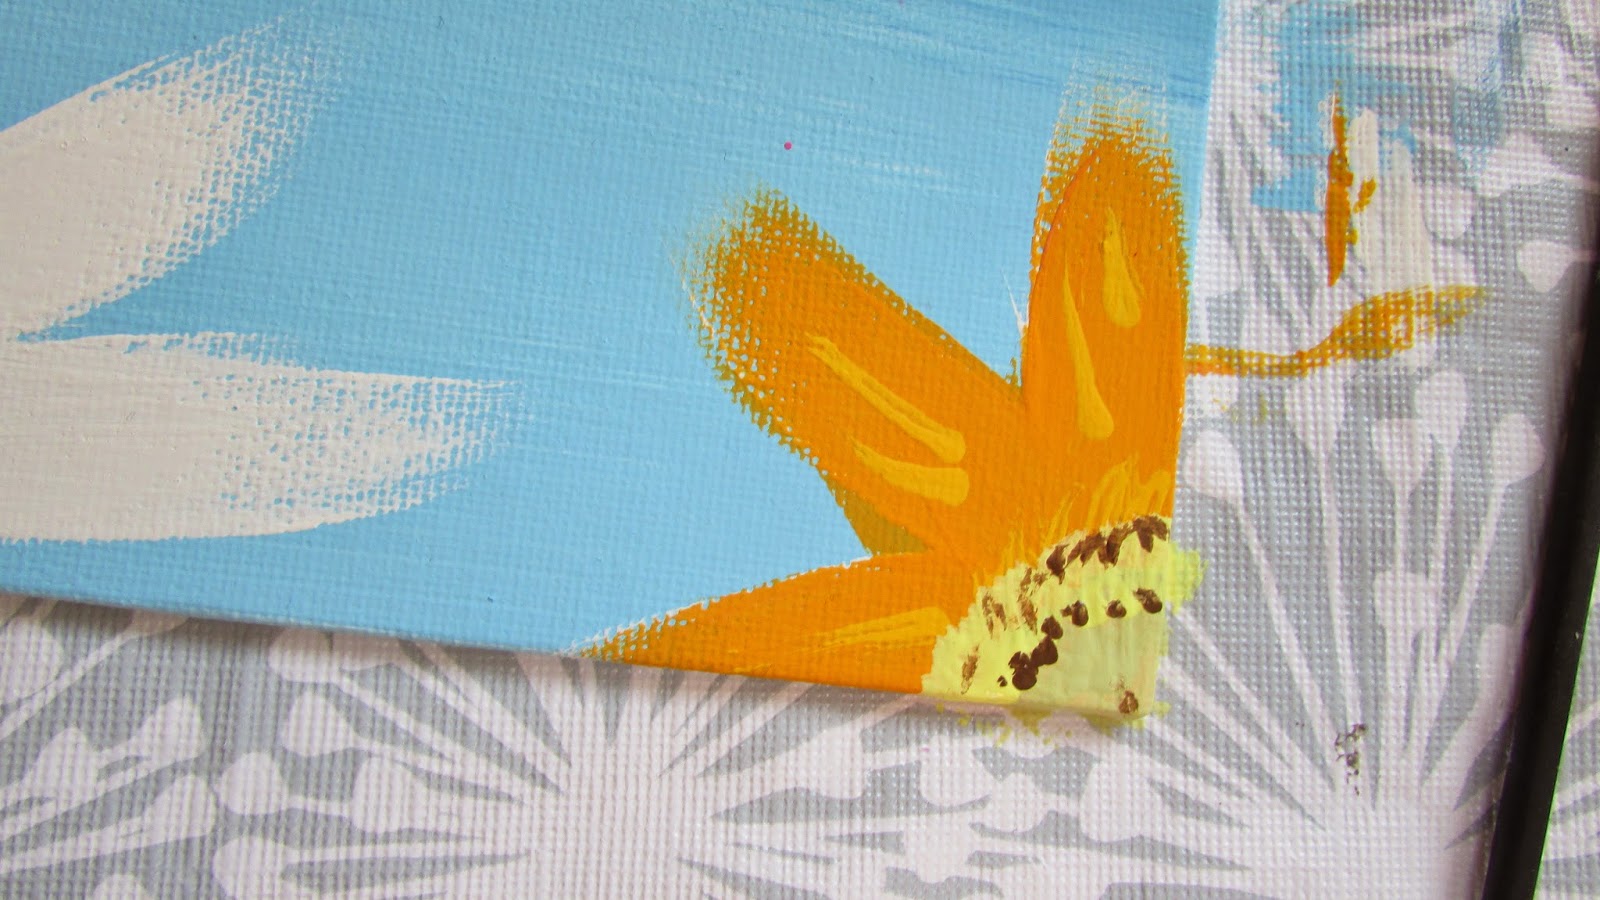
4. Paint your desired design on the canvas. I chose to make a bunch of abstract swirls. Browse Pinterest and other sights for inspiration.
5. Feel free to mix colors to create new shades.
6. Continue with your design until desired look is compltely.

Remember, more water less paint!


I took inspiration from this site!


I love this cool tones of this piece!

DIY GOLD GLITTER VASE 


Supplies:
Glass vase
Paint brush
Gold paint
Gold glitter
Rubbing alcohol


1. Pour gold paint into vase
2. Add glitter
3. Tip upside down until paint slides down vase in your desired pattern.
4. Let dry overnight or until completely dry.
5. Fill with flowers or anything else!

Again, you can see the finished product in the very first photo! I chose to add sunflowers!

PEEK-A-BOO WASHI TAPE DOOR


This one is super simple! All you've gotta do is tape the inside of your door. It's invisible when closed but adds a nice pop of color when open.

That's all for the second part of my DIY Summer room decor! I hope you enjoyed.

Sunday, July 12, 2015

DIY Summer room decor! (part 1)


Hello! I found a ton of inspiration for some DIY room decor on Pinterest and I just had to share my favorites! All of these DIYs are super Summer-y, easy and fun to make! I definitely hop you try them out. This is part 1 and part 2 will be coming super soon.

DIY DONUT DECAL


 Supplies:
Beige and Pink (or desired color) scrapbook paper
Various color scrapbook paper scraps
Scissors
Glue
{Round objects to trace & pencil}


 1. Trace 2 circles on beige paper, and one circle on pink paper and cut them out. The beige paper is the donut and the pink is the frosting.
2. Trace the donut hole onto the frosting paper so that they two holes line up.
3. Cut out a wavy pattern around edge of pink circle to resemble frosting.
4. Match up the two donut holes, and glue the pink paper over the beige.
5. Cut out and glue con various colored sprinkles.


DIY WATERMELON JAR


 Supplies:
Mason Jar
Watermelon colored paint
Sharpie
Green ribbon
Hot glue
Paint brushes
Rubbing alcohol and cotton

 
1. Wipe down your jar with rubbing alcohol to ensure that your paint will stick.
2. I had to mix some shades to create my desired pink/coral.
3. Pour the paint inside the jar and paint the entire surface. If you'd prefer a matte finish, paint the outside of the jar. Once it's dry, paint another layer until opaque. Let dry completely.


4. Draw on some little oval shapes to resemble seeds with a black sharpie.
5. Glue on green ribbon around the mouth of the jar with a hot glue gun.


And you're done! Feel free to fill with flower, makeup brushes or whatever else you desire!

DIY WASHI TAPE DOOR STOP


 Supplies:
Washi tape
Door stop
Scissors


 All you have to do it cut out your washi tape to fit the door stop and arrange it how you like!
I think this looks a lot cuter than a boring plastic door stop.

 
I originally planned to do all of my DIYs in one post but there were too many! Look out for Part 2 coming this week!

Saturday, June 6, 2015

DIY Starbucks Cool Lime Refresher


Hello! For the month of June, I thought it would be fun to do a little weekend series sharing a DIY Starbucks recipe every weekend! To kick things off, I'm sharing one of my favorites for Summer, the Cool Lime Refresher. This is the perfect summer drink with the sweet tangy lime, cucumber and hint of mint! These drinks won't taste exact, since I'm not using any syrups or anything, but I must say they are very good!


 All you will need is:
The juice of 1 lime
1 mini cucumber (about 1/2 cup) peeled and chopped
4-6 finely chopped fresh mint leaves
Water (about 1/3 cup)
Lemonade (around 1 cup)
Sugar (optional)

This recipe serves 1!
It's best to start this drink the night before, or at least 1-2 hours before (overnight is best). Start by adding your cucumber, mint and water into an airtight container and refrigerate.


 Squeeze the juice of 1 lime (leave some slices for display) in a cup.


 Next, strain your cucumber mixture and fill to the first line of a Starbucks cup. It's about 1/3 cup.


Fill the rest up with your lemonade, add ice and your lime slices & enjoy!


 I hope you try this one out! :)

Saturday, May 2, 2015

Weekend Project #6 DIY Spring Canvas Art


I am so excited to be sharing this! I had a sudden urge to paint a spring themed canvas and I'm really proud of how it turned out! I thought I share a little tutorial so you can try it out too. I think this will really brighten up and room and any mood. If you try it out, let me know, as I'd love to see recreations.


 You only need a blank canvas, paints of your choice and a few brushes.


 I started by choosing 3 blue paints and creating an ombre background for the floral design. I think the blue really makes the floral pop, and adds a ton of extra color. You could leave it like this and it would look great too. You can really stop and any of the steps and it would look  just as amazing. I just wanted to go for extra detail. 


 These were the paints I used if you were wondering!


 Next I took a white paint and just free handed some flowers. No matter what. I think it will turn out great. Even if you don't thin you're artsy (I'm definitely not that skilled) whatever you paint will have personality. Even if you think you messed up, keep going it will all turn out in the end! Again, leaving it like this would be beautiful!


 I used white underneath so that the colors would pop. Then I went in with some super bright shades to fill in all but 2 of the flowers, as I wanted a couple of daisy-like flowers.


 Of course, I had to add the yellow center to the daisies.


 To add a bit of dimension, I mixed up some of the shades so I had the same color in a darker shade. I went in and did a bit of "shading" on the flowers.


 Finally, I filled in the centers with various colors, alternating the order, and added some brown spots.


I really love the finished look! It didn't turn out as I expected, but I think I prefer it that way.

I hope this gives you a little something to do this weekend!

Saturday, April 25, 2015

DIY Honey & Lemon Acne Spot Mask


Hello! I breakout a few times a month and never really bother to do anything about it. I've recently been trying this DIY honey and lemon spot mask and it's not too bad. it doesn't work wonders or anything but it definitely shrinks my pimples a bit! I thought I'd share the recipe even though it's almost too simple to bother sharing!


All you need is honey and lemon juice! I sued pre-squeezed juice but you can definitely squeeze your own. I usually use about equal parts of each, but you can just it to your preference. Once you've mixed it up, apply it to all of you acne. You can apply it all over if you'd like too, but I've never done that!


That's about it! Hoped this helped a bit, have a great Saturday!

Saturday, March 28, 2015

Weekend Project #5 DIY Jewelry dish


I have had so much fun with my Weekend Projects in the past, I just had to do another one! This week's project is a DIY Jewelry Dish.It's really chic and customizable to match any bedroom. It's super simple to make so I would definitely recommend trying it out! It's not just for jewelry, you could store anything you'd like in it!
Enjoy :)


 Some supplies you will need are:

-A bowl or dish (I found mine at the grocery store)
-Rubbing alcohol (for best paint adhering) 
-Paint of your chosen colors
-Paint brushes
-Varnish (optional)
-Washi tape &/or anything else to decorate (optional)
 
 
 I had this bowl lying around for quite a while and it seemed so boring. I decided to jazz it up a bit with some paint! You can really use any dish you'd like. 
First, I quickly wiped down the bowl with rubbing alcohol, to make sure the paint would stick.
 
 
I then went in with a gold acrylic paint. Don't worry if it looks awful on the first coat. I think mine took about 4 or 5 coats to get to my desired opacity.


Once the outside had dried, I moved onto the inside. For the inner portion of the bowl, I chose a pale pink acrylic paint.  This one took about 2 to 3 coats.
Since this paint has a matte finish, I went over it with a varnish to give a glossy shine. This step is optional, but I think it really pulls the whole thing together.


And that's it! If you'd like, you can decorate it with anything else but I decided to keep it plain. This is a great organizing piece for any room.

That's all for this DIY, have an amazing weekend!