Thursday, October 30, 2014

October empties 2014


It's come to the end of the month again and I cannot believe October went by that fast! I didn't finish up too many products but I used up a few. Here's my October empties!

Kirkland Makeup Wipes: I don't think I need to say much about these!

Tone Mango Splash Body Wash: This smells divine and it's my second bottle! I would definitely recommend/repurchase! 

ONYX Acetone: This removes my nail polish so quickly I always repurchase it!

Olay Satin Care Shaving Gel: This doesn't dry out my legs and gives a clean shave. This is also my third or fourth bottle!

Nivea Essential Lip Balm: I actually finished two of these andf have already repucrchased!

MUFE HD Primer sample: This worked very well although it only gave me 1 or 2 uses!

Those are all of my empties! Enjoy your Halloween!

Tuesday, October 28, 2014

Last-minute Halloween costume ideas! (Quick & simple!)


I'm definitely a procrastinator when it comes to, well, everything! I usually wait till the week before to plan my Halloween costume! I thought I'd share some ideas for super simple and quick costume ideas! Most of these use items you may already have.
Enjoy!


-Red & white striped top
-Red/Red & white hat
-Jeans
-Glasses (optional!)

Where's Waldo costumes are super cute, classic and easy to put together!


-Red dress
-Clip-on bangs (if you don't already have bangs!)
-Brown hair spray (if you don't have brown hair of course!)
-Black sandals
-Sticker paper to create the design on Lilo's dress

Lilo from Lilo & Stich is super cute but takes a tiny bit longer with the DIY dress


-Black & white striped top
-Black hat
-Black mask
-"Money" bag

All you really need to be burglar is the top and hat but if you want your costume to be more noticeable, wear a black eye mask and carry around a pillow case with a "$" on it!


-Red & white polka dot dress (or some type of outfit using red, white, & black with polka dots)
-Minnie ears
-Black/red/yellow shoes

Minnie Mouse is super adorable and simple for a last-minute costume


-Graphic tee
-"Leather" vest or jacket
-Edgy/distressed jeans
-Combat/moto boots
-Bandana (optional)

A biker chick is a bit more on the edgier side. It's last-minute yet still unique!


-Baseball tee
-Baseball hat
-Socks

All you've got to do is wear a baseball tee & hat with some socks sticking out of your sneakers!

Those are all of my costume ideas for this year! I hope it helps all of you last-minute people! :)

Sunday, October 26, 2014

Maybelline Brow Drama ~ Review


So recently I posted a "new at the drugstore" and I included the new Brow drama by Maybelline. I've had the time to try it out and today I'm reviewing it! I found it at Walmart for $9.99 and there were 3 shades. 


It came in dark brown, blonde and soft brown. I chose soft brown and I find that it matches my medium brown hair perfectly! 


The packaging is extremely similar to their great lash mascaras except the Brow drama has a sleek black tube. 


This is the first product of it's type that I've seen at the drugstore. It reminds me of Benefit's Gimme Brow, although I've never tried that.  The wand it straight with a round ball at the tip. 


The tinted brow gel is easily brushed through the brows and after a few strokes, my brows were noticeably darker and less sparse. This products gives the brows a natural look while still slightly filling them in. Not only does this fill in your brows, it also sets them in place and lasts all day.


OVERALL:
Packaging: 8/10
Lasting power: 10/10
Color payoff: 8.5/10 natural
Price: 9/10
Would I repurchase?: Yes!
Would I recommend?: For sure!
Overall rating: 9/10

I hope this review was helpful!

Saturday, October 25, 2014

Color of the season: GREY


More fashion! Lately I've been seeing a ton of grey fashion on Pinterest and in person! Grey is one of my favorite colors to style since it's so simple yet there are so many shades and variations! I've put together 5 outfits using grey as the main color. Feel free to swap in whatever pieces you own if you recreate these outfits.

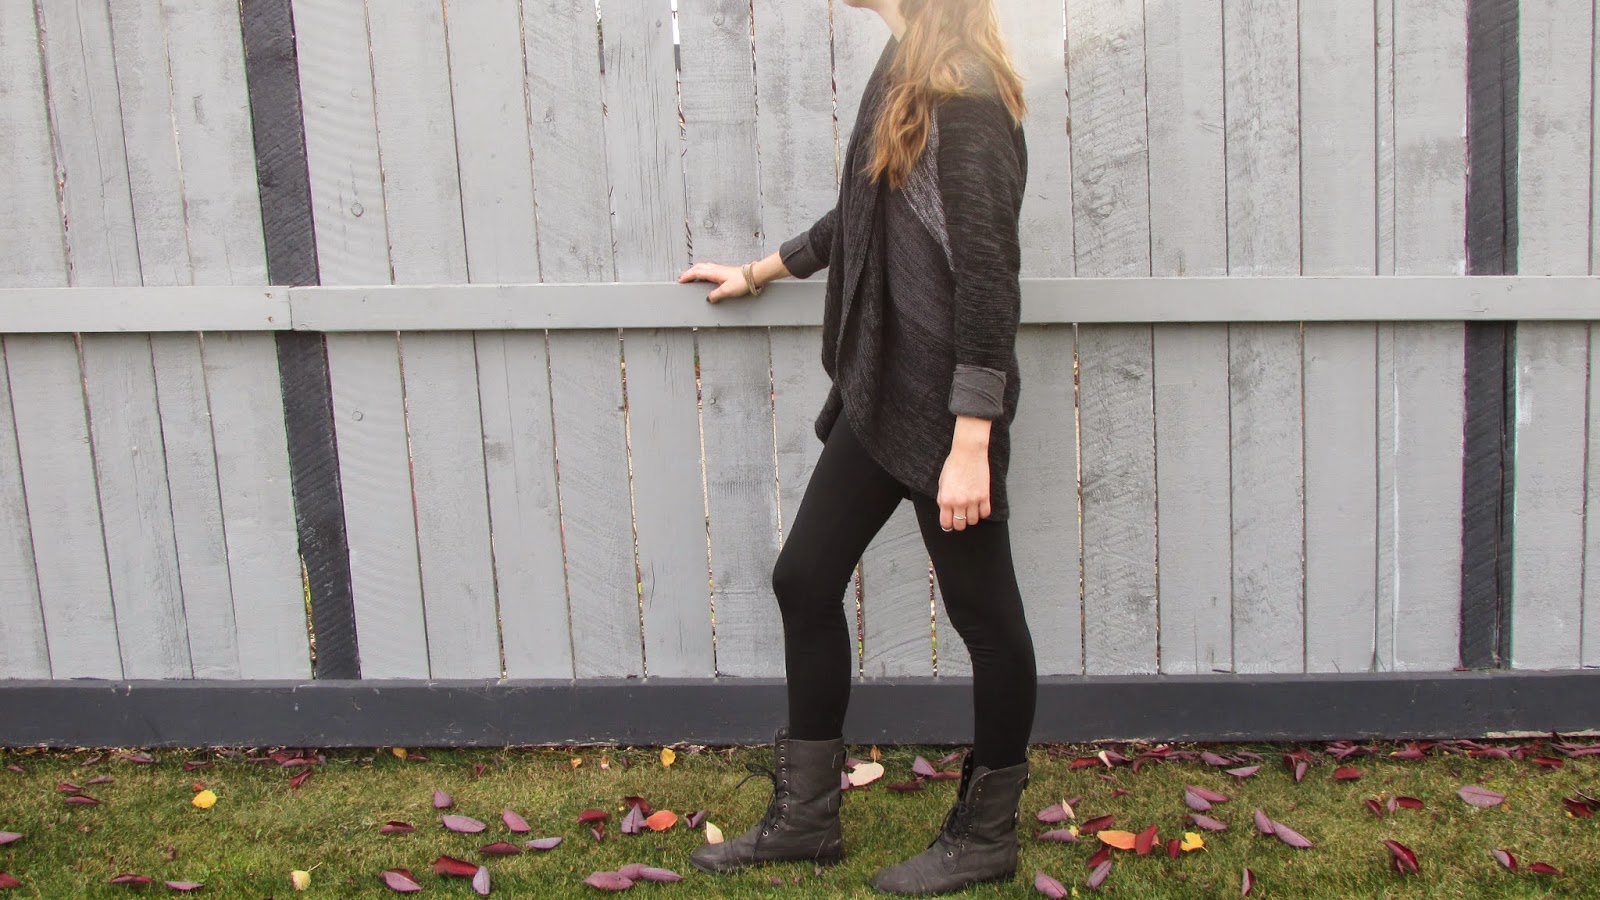
Full on grey


cardigan: Local store
dark grey long sleeve: Winners
light grey cami: unknown
leggings: Forever 21
grey combat boots: Claire's
rings: Topshop
bracelet: Simons

Slouchy casual


grey top: Simons
striped sweater: Urban Outfitters
leggings: Forever 21
sandals: Sanuk
scrunchie: Forever 21

Edgy grunge grey


t shirt dress: Target
flannel: Winners
combat boots: Claire's
necklace: H&M

Comfy tie dye


 sweatshirt: H&M
tee: H&M
tie dye leggings: Winners
shoes: TOMS

Easy layers


tank: Garage
cardigan: Winners
pants: Forever 21
pineapple slip-ons: Call it Spring

That's about all. Enjoy what's left of the weekend!

Thursday, October 23, 2014

Bad hair day


We all have those days where we either wake up late, or wake up with some absolutely troublesome hair. This happens to me on most days! Here are some of my favorite ways to deal with hair that won't agree with you.

1. Dry shampoo. This is probably the key to getting your hair to cooperate. It will soak up oils making your hair look fresher as well as add texture to your hair.

2. Tease it. After I apply dry shampoo, I like to add some volume by teasing it. My hair is very flat so this is much needed. This will make it look like you hair is full and voluminous.

3. Pin it back. If a piece of hair is bothering you, pin it back! If it bothers you now, chances are it will annoy you throughout the day so just deal with it while you can!

4. Put a bow on it. Adding accessories can distract from your bad hair days. If you pin up teasted hair with a bow, it looks super cute!

5. Straighten or flat iron curl. Don't bother sectioning your hair, just straighten or curl a few peices on the top and add some dry shampoo/hairspray for texture.

6. Throw it up. Whether you prefer a bun or a ponytail, getting it up and out of your face will hopefully allow to forget about it.

7. Wear a hat. If all else fails, wear a hat! 

I hope this tips were helpful! Have an amazing day! =)

Wednesday, October 22, 2014

Small open wound tutorial (Using household items!)


Today is definitely a step out of the box for me! I've never done a Halloween tutorial or anything even close to this before! I love playing around with makeup during the Halloween time and I thought I'd share a bit! I love finding things around the house to substitute for professional tools. I thought I'd keep it simple for today and just show a small wound tutorial. I'm not perfect in any way and could definitely use some improvement but it's all for fun in the end! I hope you enjoy and please let me know if you'd like me do do any other Halloween-themed posts!

Materials shown: Small cloth, plastic knife, Maybelline FIT me face powder, Covergirl 3 in 1 foundation, Wet n Wild stoplight red lipstick, elf black eyeliner, lip palette, various brushes, Lip smackers clear gloss, NYX blush in peach, glue stick, Mac fix+, Q-tips.

The materials you will need aren't exact. Feel free to swap out some things for others you feel will work better or for things you already have on hand! The main things you will need are a glue stick, red lipstick, black liner/eyeshadow, foundation, and a plastic knife or something similar.
I'd also like to apologize in advance for my chipped nails! *cringe*


I placed the "wound" on my hand as is was a flat and fairly easy surface to work on but you can place it wherever you please! I prepped my hand by cleaning it with rubbing alcohol so that the glue will stick better.


First, lay a glob of the glue stick onto the desired area. Smooth down with a spatula or plastic knife. If it's difficult to smooth, dip the knife in water first. After it's smooth (mine was a bit too round and raised) make a slit down the center with a toothpick. Don't make this too perfect since it is a cut.


To add some texture, place a little bit of cotton, either from a cotton ball or cotton swab, and smooth it down with the plastic knife.


To make it look a bit more like skin, cover the glue with a layer of foundation or concealer, Re-trace the cut and powder it all to set and mattify. Apply a matte blush around the edges to add an irritated look. Be sure to use only matte products throughout the whole wound so it looks as natural as possible.


The next steps have to do with personal preference. Tweak the look and "design" it to your preference. I colored the whole wound red then added depth to the cut with a black liquid liner. To make the liner less harsh, I went back in with red lipstick and played around with it. Darker red looks more realistic than bright red lipstick red!


This is the fun part (to me at least)! I added a taupe/brown shade around he edges to show a bit of bruising. Then I diluting red food coloring with a tiny bit of water and added that to the center and blended it around. I also added some clear lip gloss for a really gross, fresh look! I also smeared the food coloring (or you could use fake blood) around the cut to look as if it dripped and spread.

A few other things I did wear distress the wound  bit with a toothpick and spray it with MAC's Fix+ to make it last a bit longer.


I think I made the mistake of making the wound too raised from the skin and making the shape a bit too "perfect". I hope you can get some inspiration from this and possibly try this out for Halloween!
Bye! :)